A number of the projects here were completed before this blog was even the seed of an idea…
For old projects, I’ll try to remember and share how I did it; hopefully they still provide some amusement / ideas as they are…
Fairy Cake Mother – Baby Shower Cake
I have been granted the great honour of the title “Fairy Cake Mother” – a position tasked with the sacred duty of creating birthday cakes for the newborn child of a dear friend until their 18th birthday…*
My first contribution pre-dated the birth: a baby shower cake celebrating a potential path for the first 25 years of the child’s life…
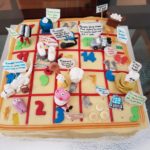 Originally planned as a snakes and ladders board, I decided instead to present the possible milestones without the judgement implied by a snake or ladder. It definitely wasn’t because I went crazy with ideas and then ran out of room… nope, definitely not that…
Click on the images below to see each age, or skip the gallery to see the descriptions, explanations and notes.
Except where noted below, everything but the toothpicks was edible, including the rice paper signs. As usual, fondant and edible ink pens
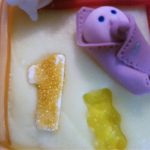
- Age 1: Baby – fondant baby and tiny gummy bear teddy
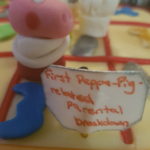
- Age 3: First Peppa Pig-related parental breakdown – you know it’s coming… if it’s not the hundredth Peppa episode that puts you in the straight jacket, it’ll be the Wiggles or their successors
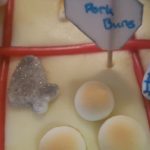
- Age 4: Discovers pork buns …. mmmmm pork buns…. – tiny honey bun things I found in a random Asian “Jerky House”
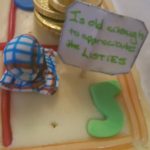
- Age 5: Discovers the fabulous comedy duo The Listies (and their tea-towel aliens) – you don’t need to steal a child to enjoy The Listies – a bunch of us adults regularly enjoy them without any excuse. The six year old I took to their 1 hour comedy children’s version of Hamlet (yep, you read that right) nearly stopped breathing she was laughing so much…
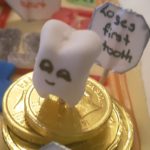
- Age 6: Loses first tooth – foil covered coins and a fondant tooth
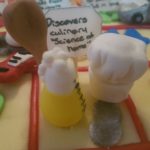
- Age 7: Discovers culinary “science at home” – the excuse her mother and I use for experimental food combinations that fail as often as they succeed (some things should never be mixed with prawn crackers)
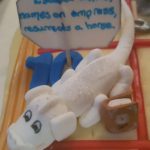
- Age 10: Escapes bullies, names an empress, resurrects a horse – Bastian was ten for his Neverending Story adventure, so it’s entirely possible a similar adventure awaits as this child hits double digits (Artaaaaax!). Edible glitter gave Falcor his bling, and edible silver paint reproduced the book cover and Auryn
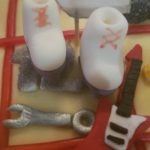
- Age 12: Finds a new passion – rollerskating, playing guitar or engineering, who knows what new thing will pique an interest
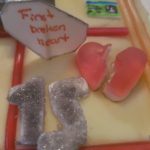
- Age 15: First broken heart – who knows when this will actually happen, or who for, it won’t be fun. 🙁 I cheated and this is from a store bought pack of gummy shapes, but even with a scalpel it was surprisingly difficult to cut the right crack. Maybe my heart is just extra resilient…
- Age 16: Gets drivers licence – this a perfect fondant replica of my own licence… couldn’t you tell?
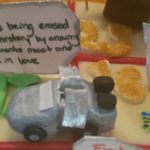
- Age 17: Escapes being erased from to history by ensuring her parents meet and fall in love – Marty McFly was 17 when he embarked on his fateful DeLorean adventure let’s hope the guitar lessons have kicked in by then. Silver-painted fondant car with painted rice paper doors.
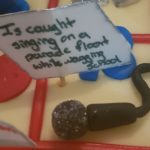
- Age 19: Is caught singing on a parade float while wagging school – Ferris Bueller may not have been caught, but he hadn’t used up some of his luck in Fantasia, time-travelling or surviving science at home…
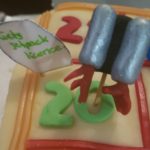
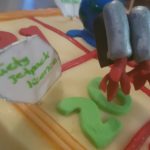
- Age 20: Gets jetpack licence – every generation imagines a future with jetpacks – perhaps by the time this child is 20, it’ll be a reality…
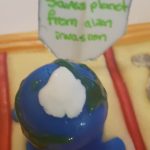
- Age 22: Saves the planet from alien invasion – who else but a young woman with experience in time travel and alternate worlds, her own jet pack and a great pair of bootskates could be relied upon to save the world? I like to think the failure of the green gel icing and the fondant Arctic circle to really work here are just a symptom of the havoc wrought by the invaders…
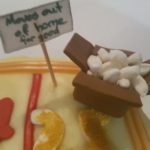
- Age 25: Moves out of home for good – some people expressed surprise that leaving home came so late (although who’s to say it wasn’t just the age she just finally cleared her stuff out of the garage)… But really this was just my way of justifying an end-age for the predicted future. 25 squares worked well and the framing of the 25 years as those at home with her parents created a nice narrative. The box is fondant, the styrofoam ‘packing peanuts’ are slices of mini marshmallow.
The cake was chocolate mud with buttercream frosting, and red fruit ‘liquorice’ strap lines.
*I have been lucky enough to be awarded the title Fairy Cake Mother twice. Sadly, I now live in a different state to the first family to grace me with this honour, and it become more and more difficult to discharge my duties… Hopefully I can do better by the second and make it up to the first later.
Mini Doctor Whos
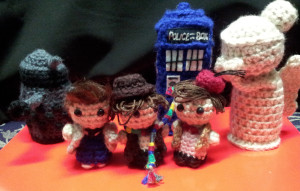 Like all good nerds I was raised on Doctor Who and have enough Doctor-obsessed friends that it was inevitable for me to eventually require Doctor Who crochet patterns…
I’m also a huge fan of Ravelry.com – if you’re into anything knit or crochet, it’s a great place to collect ideas, develop a library of patterns and connect with other craft-mad humans.
These two loves came together when Ravelry first introduced me to Pixelated Mushroom – blog of Nyss Parkes – who (among other things) creates great patterns, and shares some of them free of charge.
Perhaps my favourites of hers is a collection of Mini Doctor Who patterns, including 11 different Doctors. She has also provided a free TARDIS pattern, just big enough to fit the mini doctors.
They’re simple to follow, and I’ve also used them as the basis for many other amigurumis, such as Sherlock, and Merlin (which I’ll post here later).
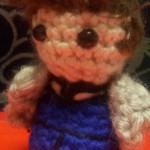
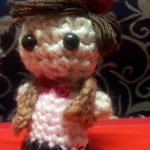
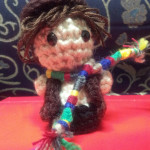
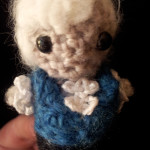
Here are a couple of the Doctors I’ve done for friends:
- Jon Pertwee and David Tennant’s hair were done with special wool. You can find some of my hair tips here.
- For the TARDIS in the picture above, I used a pattern purchased from SarasCrochetCouture Etsy store. It was a little larger and little more robust than the Pixelated Mushroom free pattern, and was exactly what I needed for that project. (Although I have used the PM free pattern several times as well – she even has a Christmas ornament version.)
- Ravelry also has a free Weeping Angel pattern by Shirley MacDonald, and a Dalek Egg Cosy by Ellie Skene, which are both also included the picture at the top of this post.
These patterns and other Dr Who crochet craziness can also be found in this post from mooglyblog.com, and there are many, many more in Ravelry’s libraries.
Happy wool-based nerding!
Creating the right do for your doll
I’ve found that when making dolls, it’s the hair really sells it. Many patterns will include instructions for hair, and if you like the look of the pictures that come with them, just follow those.
But there are a couple of tricks I’ve learnt that help me when I’m creating my own amigurumi from scratch, or adapting others.
A wig cap
You can crochet an entire head of hair using this method. You can also create a ‘wig cap’ as the base for a more complex hair style where you want something to attach hair to, or just to keep the head colour from showing through a more sparse wig.
If your doll/amigurumi pattern starts at the head, just follow that pattern in the hair colour. If the pattern starts to decrease and you haven’t got the coverage you need just keep crocheting, either without decreasing, or decreasing a row later to keep it a little bigger than the head.
If your pattern doesn’t start from the head, I’ve found the easiest way is to crochet as if you were creating a hat:
Row 1: crochet 6 single crochets (SC) in a magic circle / magic ring
Row 2: do 2 SCs in each stitch (12 stitches)
Row 3: [2 SCs in first stitch, 1 in next] repeat to end (18 stitches)
Row 4: [2 SCs in first stitch, 1 in each of the next 2] repeat to end (24 stitches)
…continue adding to the pattern (2 in first then 1 in next 3, 2 in first then 1 in next 4, etc) until your wig cap is as wide as the head (you might only need the three rows).
Then do 1 SC in each stitch until you need to start decreasing (if you need to start decreasing).
After each row, try it on to see how it fits. Snug is good: too tight will shrink the head and make it look weird; too loose and it won’t attach well, or will make the head look too big…
When you’re happy with the size, finish off and attach it to the head (or add something else to it first if you wish – see below).
Hair loops
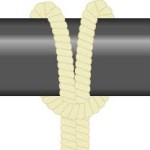 You can add hair to the wig cap by tying individual ‘hairs’ to it. I find the best method is to fold the thread in half then loop it through to make a “lark’s head” or “cow hitch” knot. This works well with normal wool (if you want curly hair, you can unwind the strands apart once tied in). You can also use textured or feathered yarn as well (see below).
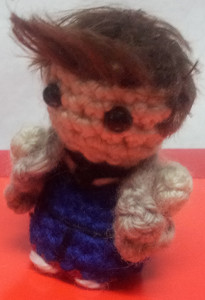
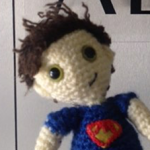
I used this for the hair at the front for Listies performer Matt:
Fluffy hair
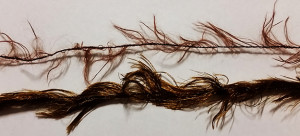 The trick with creating “real” hair you can cut into a style is to use a feathered wool.
It can be hard to work with if you crochet it (e.g. creating a wig cap as above), but is well worth the effort. You can also just sew it straight into a doll’s head. This is where the wig cap can be really helpful – it has already laid down a block of colour, so you can just sew it in rows where you need to and there won’t be obvious gaps.
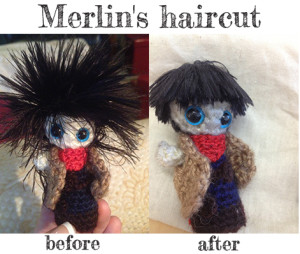
Once it’s on the head (however you get it there), you’ll want to brush it out (with a doll’s or pet brush) to get all the threads that are tucked under. Then give it a hair cut! This is the nerve-wracking bit – if you cut it wrong, you have to start the hair – or worse, the doll – from scratch.
If it’s a gift, make sure you continue to brush the hair / play with it for a day or so to get all those extra long bits that could be still tucked under the threads. And / or you could also warn the recipient that they may need to return for a hair cut.
Hair styling
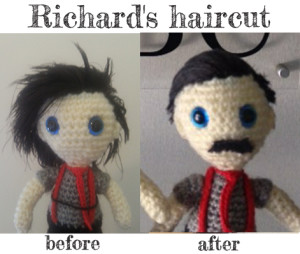
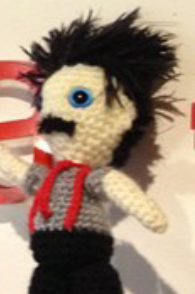
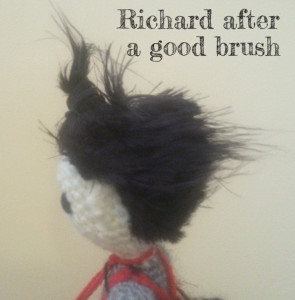
Richard from the Listies has a very smooth hair style and after a couple of months on the road, woolly Rich was looking a bit the worse for wear…
This was when I discovered the magic of fabric glue as mousse / gel.
I applied it with a doll’s brush (so it didn’t just glob all over the place) and made sure he wasn’t lying on it as the glue set, to ensure the style wasn’t mashed.
I now use this for most hair that needs to maintain a certain style. The one place I tend to avoid it is in toys for babies, as they’re likely to sucked on the head… I’ve not yet found a “safe-to-eat” fabric glue…
Do you have any great doll hair tips worth sharing?
Avengers day
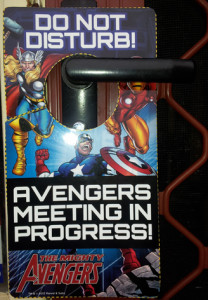 Another one from the archives, this was back in 2012, just before the first Avengers movie came out…
Continuing the pattern of being unable to watch a new movie without marathoning its predecessors with themed food, we prepared for Avengers by watching Iron Man, Thor and Captain America (sorry Hulk, there was only so much time and someone had to draw the short straw).
The food wasn’t as elaborate as Lord of the Rings Day, but I still had a great time coming up with ideas.
The food:
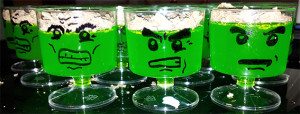
- Hulk jelly shots (jello for the Americans) – I drew the (lego-inspired) faces onto paper, then traced them onto the outside of plastic shot glasses with a permanent marker. Next added green jelly. Once the jelly was set, I crumbled flake chocolate for hair (which was actually much darker than the picture shows)
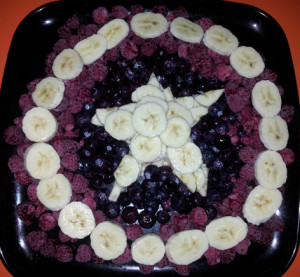
- Captain America shield fruit platter – Blueberries, raspberries and banana…
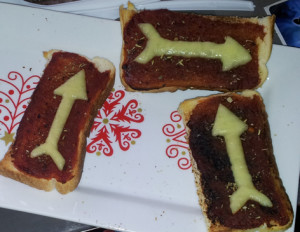
- Hawkeye pizza toast – toast with tomato paste and herbs, topped with an arrow cut out of cheese. Melted slightly under the grill.
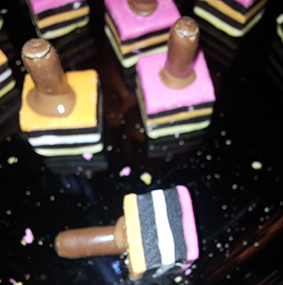
- Liquorice Mjölnir – Thor’s hammer made by melting the end of a liquorice bullet (chocolate-coated liquorice) over a flame then sticking it to a liquorice all-sort
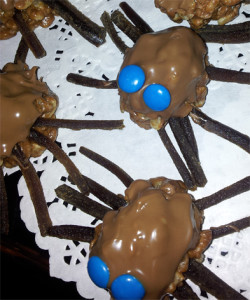
- Black Widow mars bar slice – I made mars bar slice (by melting mars bars and stirring in rice bubbles), and hand-moulded them into spider-ish shapes then coated them with meted chocolate. M&Ms for eyes and liquorice legs. (They didn’t turn out as well as I’d hoped, the Shelob cup-cakes from the Lord of the Rings Day are much better spiders)
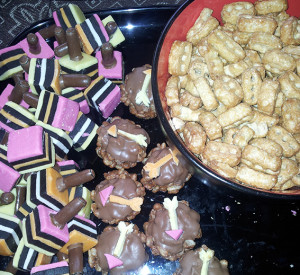
- Hawkeye mars bar slice – balls of mars bar slice, coated in chocolate, then adorned with arrows cut from the coloured layers of a liquorice all-sort.
- Nutri -grain – because the ad says it is “Iron Man Food”
- Lolly gobble bliss bombs – yes these are a real thing and my friend brought them to represent the excessive amount of explosions we anticipated…
Firefighting Koala costume (of course)
What Christmas present to get for a pregnant emergency services worker?
“A home-made costume to dress her newborn as the fire service mascot” may have been too obvious a choice for most people, but it was what I decided to go with…
Koala Ear Hat
I had always been a knitter. Several years ago I went to the effort of completely inventing/adapting a pattern for a friend’s David Tenant Dr Who – despite having seen several great looking crochet patterns around – because I was sure learning to crochet would be so much harder. But in searching for a koala-ish hat, all of the patterns that came up were crochet. It seemed it was time to trade needles for hook and take a deep breath…
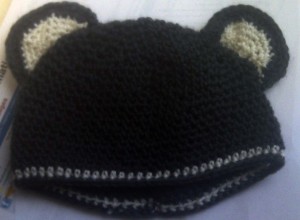 The fabulously simple and easy Little Bear Baby Hat Pattern was designed by Inkie Goijer, who has been kind enough to share it under a Creative Commons License. (The actual Non-Commercial Creative Commons License is in Dutch because it was issued in the Netherlands, but trusty Google will help you find similar versions in English if you want to check what you’re allowed to do with it.)
Best of all, I found this step-by-step video which not only shows exactly what you need to do, it introduced me to the wonderful concept of the magic ring. In fact – being pretty much brand new to crocheting – it taught me crocheting basics: the terminology, the basic stitches, and how things were supposed to look. I am a huge fan of Google and Youtube as teachers (I believe that you can teach yourself almost anything* with enough Googling), but anyone with a computer and working internet can upload to Youtube: instruction videos are not created equal, as I very quickly found out. This one, though, is an excellent video… Even if I did have to keep pausing to keep up at my newbie speed.
*apparently you shouldn’t try to teach yourself brain surgery or munitions disposal through Google – even its almighty reach has limits.
I’ve since made this hat several times more, and the one change I make is that I prefer to do things as a spiral instead of in rows – I don’t add the “joining slip stitch” at the end and the “chain 1” at the beginning of each row, I just keep going. It makes it smoother (because there’s no seam), but it is less neat if you want to add the coloured line along the bottom. You do need a stitch marker to keep track of where the new row starts, but a something as simple as a paperclip hooked into the first stitch works perfectly well. (A good explanation of the differences/advantages/disadvantages of spiralling vs. joining can be found here.)
Firefighter Jacket
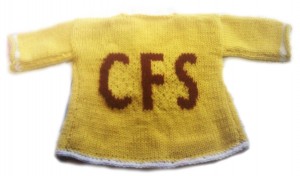
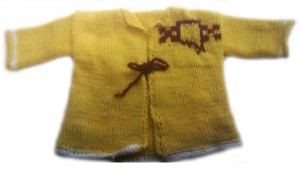
I can’t find the exact pattern I used for the basic yellow jacket (without lettering). I can tell you it was really simple and I found it on Ravelry, or adapted it from something I found there. If you haven’t come across Ravelry before, it is a magical world of patterns and shared projects, and they will not in any way spam you once you’ve signed up. Seriously, head over and create an account now. I’ll wait.
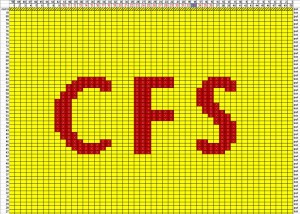
The red lettering and logo weren’t actually as difficult as they might look because the body of the jacket was essentially a square. I made a grid (I did it in excel, but you could do it on paper), with the same number of rows as my pattern and the same number of columns as I had stitches. I coloured in cells (with a lot of trial and error) until it looked right. I then knew which stitches needed to be red and which were yellow. The pattern stretched a bit in the actual knitting because my stitches are slightly taller than they are wide, but it seemed t work out OK.
The real difficulty was in getting it to look nice on the back while carrying the colours across. I trialled a number of things as I went (with trusty Google providing me with other knitter’s suggestions), and wasn’t entirely happy with the end result… But I settled on carrying the colour across the back and picking it up occasionally when there was a big gap to prevent loops behind my work.
Mum and bub were exceptionally happy with the final result, even if her colleagues thought I was a bit mad… 🙂
Lord of the Rings day
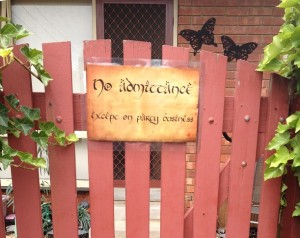 Apparently it is possible to see a new film in a franchise without marathoning its predecessors, but where’s the fun in that?
It was late 2012, the Hobbit was due out Boxing Day, and we weren’t going to get through nine hours of movies without stupid amounts of movie-themed food. (At least that’s what I told myself – as if I needed an excuse to create stupid amounts of movie-themed food…) Besides, it wouldn’t be Middle Earth without second breakfast, elevenses and twelve other meals shoe-horned in…
As always, Google was my research assistant, aided by some out-of-the-box thinking. Here is some of the final creations:
The Savoury:
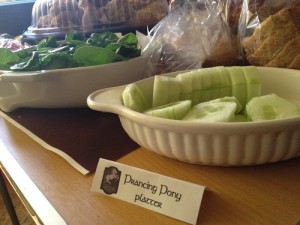
- Prancing Pony Platter – an excuse to have some actual real food amongst the madness. Included crusty bread, BBQ chicken and sandwich vegetables
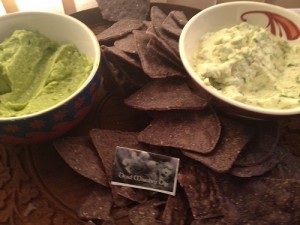
- Dead Marshes Dip – guacamole and blue corn chips (with another dip I can’t quite remember…)
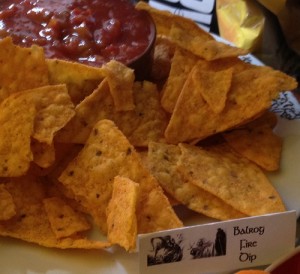
- Balrog Fire Dip – hot salsa and spicy corn chip
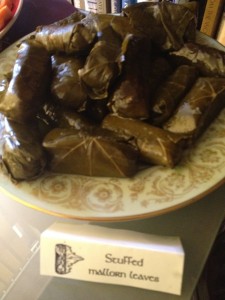
- Stuffed Mallorn Leaves – store bought dolmades (rice-filled vine leaves, for those not yet converted)
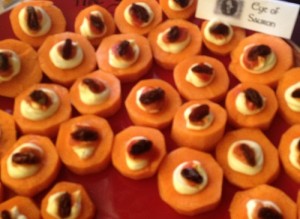
- Eye(s) of Sauron – carrot rounds, a splodge of cream cheese, a dollop of sweet chilli and half a sultana
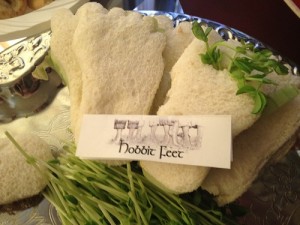
- Hobbit Feet – beef and cheese sandwiches cut with a cookie cutter, sprouts for hair
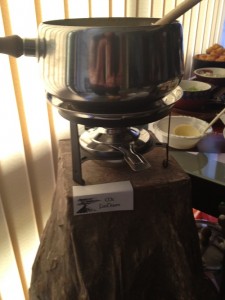
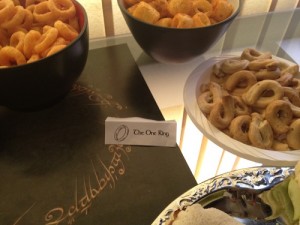
To complete the savoury madness, I created “Mount Fondoom” – cheese fondue on top of a “mountain”, into which we threw “rings” in the form of burger rings, pretzel rings and toobs.
.
The sweet:
we ended up having a “dessert room” as there wasn’t enough room for the sweets out with the savoury. This in itself was enough to excite several of the guests…
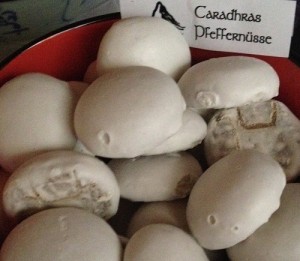
- Cahardas Pfeffeneusse: – I cheated and bought these ready made
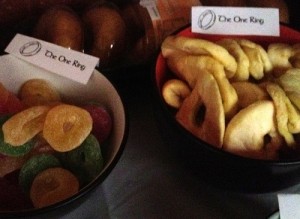
- More Rings – this time gummy and apple rings
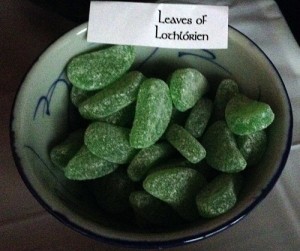
- Leaves of Lothlorien – store-bought mint leaves lollies
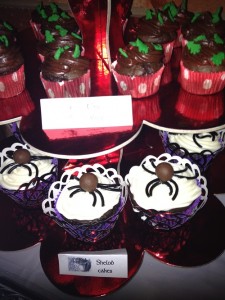
- Shelob and Ent cakes – chocolate cupcakes with vanilla frosting. The Ents were Christmas tree sprinkles I found at the local shop; the spiders were made with maltesers and liquorice
- Gollum’s Goodies – store-bought chocolate fish
- Uruk-hai Creation Mousse -this was the most fun and also the most disturbing. Brown jelly baby men* in instant chocolate mousse (*I don’t actually remember what these lollies are officially called, perhaps you can help out in the comments…)
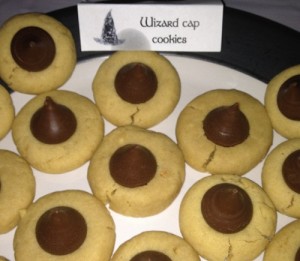
- Wizard Hat Cookies – peanut butter cookies with Hershey’s kisses pushed into them while still warm
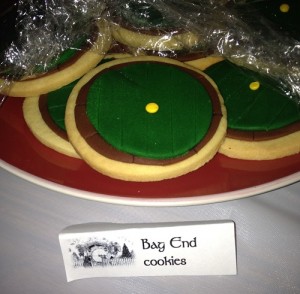
- Bag End Cookies – butter cookies with brown and green fondant, topped with a yellow mini M&M for the handle
Turned out to be a fabulous day, enjoyed by all who rolled themselves home…
